Thursday, 27 October 2016

How to make your own Bandhanvaar/Toran/Door hanging this Diwali

In India a bandhanvaar/toran is considered auspicious at the entrance of our home. It is a way to welcome our guests and adorn the house. A mango-leaf toran, essentially a door-hanging, is mostly made on auspicious occasions. However they do not last long. Decorative hangings, on the other hand, last longer maybe even a few years.

Peacock design and hues are my new favourites. On this Diwali, the bandhanvaar, rangoli at home, even my saree is going to be inspired by this beautiful bird. I will try and upload the rangoli pictures depending on the internet connection I get, since I am travelling home :)

diy-bandhanvaar/toran/door hanging
Bandhanvaar/toran/door hanging


I am sharing a bandhanvaar diy for the same today. You can use this design or alter it and make your own toran this Diwali.


Design planning and final look
Planning a bandhanvaar

SEGMENT-I

Peacock pattern cut-out & decoration

Peacock-design/template/diy
What you will need for the Peacock pattern


As you can see in the picture above, I have cut out the peacock design on a sheet of thick paper (use those old sturdy catalogues or cards), which is pasted on a buckram (a stiff cloth) and together this creates a firm base. On either side of this base, I have used two shades of felt cloth (colour can work just as well). Plan your design and use embellishments for the inlay work. I have used an assortment of golden beads, coloured stones, mirror and yarn pieces. For the planned design, we would need two of these cut-outs.


decorating a peacock pattern
Inlay work on the peacock design

A peacock, as we all know is incomplete without it's crown and tail feathers.
For the crown, I used a wire to string the red and blue beads together. The wire helps make the structure strong and flexible. See the pictures below for detail. 

peacock crown-diy peacock designs
Peacock's crown

For the tail feathers, I have used different shades of blue and green pom-poms along with yellow and blue clay beads and kaudi (form of conch-see picture below)


peacock tail feathers-peacock designs diy
Peacock's tail feathers

For the complete look, an eye is a must. I have painted one and stuck it to the cut-out. Black beads would work too.

Eye cut-out
peacock designs cutouts
Final look of the Peacock cut-outs

SEGMENT-II

Weaving beads for a chain

For the planned design, a chain structure will be required, from which the bead and pom-pom strands (segment-III) can be hanged. I have weaved a basic bead chain. It is very simple, just follow the video below to weave similar chains.

basic right-angled bead weaving
What you will need for weaving(left image)
final look of the right-angled weaving(right image)


SEGMENT-III

Preparing the hanging strands ('W' & 'semi-circle' patterns)
beads/pom-poms/mirrors/wooden birds/diy bandhanvaar
What you will need for the hanging segment
(various shades of beads and pom-poms, mirrors, wooden bird pieces, kaudi and bells)

First plan the pattern of the hanging. Like, for this toran, I have 4 sections of the 'W' structure and 3 of the semi-circle.


Begin sewing the pom-poms and beads on a sturdy string. I have tied kaudi and bells in the ends of 'W' and semi-circle patterns. To attach mirrors paste two of them together with the string in between. 
Follow the pictures below for details.

pom-poms/diy semi-circle segment
for 'Semi-circle' pattern


W pattern-diy bandhanvaar designs
for 'W' pattern
  
Once all the segments are ready, we need to assemble them together. For that, tie the strings prepared above to the woven bead-chain to get the 'W' and semi-circle pattern. Start from the middle and keep the segments equidistant for a symmetrical look. Peacock cut-outs have to be stitched to the chain ends. 
The last bit is attaching rings or loops on the other end of the peacock cut-out. Stitch (not stick) the rings to provide strength to the entire structure (just a tip-attach multiple rings, this will help you adjust the length of the toran between the nails)


assembling a bandhanvaar
Assembling various segments together


bandhanvaar on a door

Hope you enjoy working on this project. Share your own projects. Sharing and learning is what this blog is all about.

Happy Diwali guys. Have a safe one.

Wednesday, 19 October 2016

How to make your personalized greeting card


Every year this month, I make a special card for my husband's birthday. Working on new ideas and techniques has always been fun. Often it is a theme based card but this time I thought, why not do a versatile card and share it with all of you. So here it is, a hand-made card for all occasions. All you would need is - paper stock, felt cloth, some pearls and paints.

This card has 3 components. If you are short on time and still want to do it, just make those flowers and assemble on a coloured card stock and you are done. You can use any one component too, to make an entire card. Follow the pictures below and get going with your very own hand-made greeting.

Hand-made birthday card for all occasions - diy


Supplies
Materials required
(In case you don't have felt cloth, any other fabric will do to - printed cotton, satin fabric, etc)
Stencil Cutting :

The white card stock used is 15'' x 10'' and the blue one is 7'' x 9.5''. Hand-made paper can be used instead of card stock. I have created my own leaf stencil as you can see below. These stencils are available at craft stores too (In India finding them would be quite difficult, but you can always create your own just like I did).

To make your own stencil just get the right size of paper, the design you want and a good stencil cutter. The most important part of stencil cutting is planning your design and paper dimensions, in advance. Once you begin to cut and realize that the dimensions are wrong or that your design is not correctly placed, there would be no other way than to begin all over again. 

The design below is pretty simple. Cut out a leaf template, as shown in the top middle picture. This would ensure that all your leaf cut-outs are same. Next up, draw your design at the back of the sheet, to keep things neat. When drawing at the back, remember the mirror image concept. The design as it would appear, would be a reverse image of the original so plan accordingly. Once you have your design just place your work on a rough surface and begin cutting. Be careful since this will be a sharp knife. Also mark the portions that need to be cut out with a cross to avoid any mistakes.

template-stencil cutting-hobby stencil diy
stencil cutout recycle
Use your leaf cutouts for another project


I have made three types of flowers here. Begin by making your own template. Following are my template dimensions (you can always create your own) :
Template dimensions :
Pattern-1: 8cm diameter 
Pattern-2: 7cm & 5.5 cm diameters. (Divide the circumference in 5 equal parts roughly and draw the pattern for both the sizes)
Pattern-3: 3cm  x 2 cm x  0.75cm & 2.5cm x 2cm x 0.5cm (Outer length (one side) x inner length(one side) x breadth)

diy flowers - fabric


Follow the pictures for each pattern and you will get beautiful results. For the centre I have used pearls strung together and a ball of red felt fabric. You can have a choice of wooden buttons, coloured pearls or any other embellishments to go along.


Pattern-1

five petal fabric flower- diy

Pattern-2

2 layered flower - diy fabric flowers

Pattern-3

arrow head flowers- diy fabric flowers


Fabric flowers-diy


The third part is beautifying the inside of the card. I used one of the flower templates above, cut a hole in the middle of it and did some spray painting. Use regular water colours and a tooth brush. Spread out lots of newspaper before you begin. Always do a test patch, since this is your final work. Lastly, if your card stock is lighter in colour, as mine was, be a little cautious in handling and painting it.

diy spray painting

Once the insides are dry, stick the stencil onto the main card stock and assemble all the flowers on the stencil and we are good to go.


The last step would be the message on the cover of the card. I did a simple hand-lettered 'happy birthday' message with twigs of leaf. Use a pencil to write your message and then use a script brush to go over the pencil lettering with paints. If you have metallic marker-pens you can use those too.


Calligraphy-hand lettering


Give these hand-made pretty nothings to your loved ones who are sure to adore these beautiful creations.
Hope you have fun crafting your own.

Let me know how well your own personalized greeting went. Share your ideas and queries.

Happy crafting till then.

P.S : Follow the blog for upcoming festival craft, since Diwali is round the corner.

Thursday, 13 October 2016

Quilling and advanced techniques - Tutorial


I am back with the second part of the quilling tutorial blog. We will cover the remaining four techniques today viz. banding & Malaysian quilling, combing, husking and 3-dimensional quilling.

I hope you could make your own slotted tool and get started with the basics. If you did so, try and do share in the comments below. Being able to reach out and help others create beautiful things is what this blog is all about after all.

So let's cover the remaining techniques today. I have added videos for each of them too. In the end I have done a small project involving all the techniques we learnt in these two weeks. This will give you an idea as to how you can use the various techniques in your work.

Advanced quilling techniques
Quilling techniques chart


Banding & Malaysian Quilling
Banding & Malaysian quilling
Banding: as the term goes, it involves wrapping the strips around the pattern, usually with a different colour. Banding gives a different or same coloured layer to a design, making it more pronounced in appearance.

Malaysian Quilling: This is nothing but an extension of the coiling technique. Initially a loose coil is required which is then folded into a petal shaped structure as shown in the picture above on the right side. Generally Malaysian quilling uses layers of colours and is followed by banding.

Watch the video below for banding and Malaysian quilling.


Combing Technique
Combing-quilling

This technique uses a comb. We do get quilling combs online or at the craft supply store but using the comb lying at home is perfectly fine too. This generally involves weaving the paper strips around the comb teeth in various patterns. I have exhibited three different techniques using this method in the video below.


Husking Technique
Husking-quilling
Husking again is a weaving type of technique. It is different from the combing method. A combing pattern will depend upon the distance between the comb tooth for its design. With husking we can create our own pattern. We get husking templates but you can always create your own template. In the video below I have used a page from my square pad as the template. Draw your design on the template using the square markings as the guide to keep the weaving symmetrical. Fix the pins and begin weaving from down to top, starting from the centre. 


3-dimensional technique
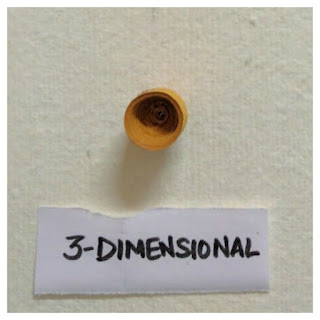
3d quilling
This technique, uses the tight coil as its first step. The coil is further pushed out to form a 3D pattern. Pins, pens or other such objects lying at home can be used to push out the coil. If you do fall in love with quilling (just like I have) and tend to do a lot of projects, I would recommend getting your own 3D quilling mould scales. This is a pretty easy technique, just be careful while pushing out the coil so as to avoid spoiling it. After you get your desired 3D figure, coat the inside and outside with glue and let it dry. This ensures that the pattern does not come undone while assembling the project.


Here is a small quilling project. I have tried to use all the techniques explained above and in the previous post, for this card. 

Going clock-wise from top left : Coiling method, 3D and beehive techniques have been used to create a flower. In the next picture, pink petals have been made using coiling and banding technique. I have used two shades of pink for this flower. Next is the bumblebee. The body has been done in yellow 3D and the head in black. The blue wings have been weaved on a comb and the antennas have been coiled and left loose. Next up are the husked sunflowers. For leaves I have taken various shades of green with yellow. Leaves have been quilled Malaysian style and banded with a dark green strip. The last are the buds which have red 3D quills and green ones for the stem.

quilling project-beehive/coiling/husking/banding/malaysian flowers/3d/fringing/combing-all quilling techniques


Husked Sunflower Petals
husking a sunflower-quilling


Different pieces assembled as flowers below.
quilling flowers-final

Assembling the pieces above on a card.
assembling a quilling card-diy


Quilled Card is ready :)
Quilling Card-flowers-ideas

After this I am sure anybody can quill :)
Happy quilling guys.

Thursday, 6 October 2016

Quilling & basic techniques - Tutorial


Paper filigree or quilling is a very popular craft hobby. Its probably been there since the birth of paper itself. Quilling projects have kept me glued for hours. Once you start, it is hard to stop. It is always a wonder that something so beautiful and colourful can be made by simply rolling or weaving strips of paper.

paper fun-quilling


Here today, is a series of videos ranging from making your own quilling tool to quilling beautiful patterns using various techniques.

I've tried to cover almost all techniques of quilling viz:
1. Coiling 
2. Fringing 
3. Beehive 
4. Banding & Malaysian quilling
5. Combing
6. Husking
7. 3-dimensional

Few basic things required in your quilling kit are: a good pair of scissors, glue, the quilling tool and paper strips. To learn all the techniques you would also need a comb, quilling board and some pins.


make your own slotted tool-quilling toolsWhen we learn something new and are not so sure about it, not wanting to invest a lot of money in it is quite natural. I faced the same challenge when I started to quill and thats when I made my own slotted tool. A piece of wood, a big needle, hammer and a pair of pliers is all you need to create your own tool. Follow the video and make your own slotted tool.


Apart from the slotted tool, a needle tool is also used for quilling. For beginners, I would always suggest the slotted tool. The slotted tool makes the rolling process pretty simple. Once you are a pro you can go ahead with the needle tool too.

You have the tool now, so lets begin with the first method - Coiling.
This is a basic and the simplest method. All shapes are made from a basic paper coil. In the picture below shapes have been displayed made with this technique. I've tried to create as many shapes as possible.

quilling-basic shapes


Watch the video below to go about the coiling technique in detail.


Fringing - the word comes from fringe. Fringe the paper strips-cut strips along the strip and quill these strips to make patterns. This technique is mostly used for making flowers. I have added a video below to display various flower patterns that can be created from fringing paper strips.


fringed flowers-quilling methods


Next we have the Beehive method. To make this continuous swirl pattern you need to know how to coil first. Its pretty simple and mostly used to fill out various shapes. Watch the video below to do a beehive yourself.

Quilled beehive-quilling methods                              


Wait for my next blog for the remaining quilling techniques and a small project. Till then you can get started with making your own tool and creating magic with colorful strips of paper.

Until next week, happy quilling :)